

Create your account and set up your organization
Sign up, run the first-time wizard and set working time, calendar features and permissions for your Teamdeck organization.
On this page
Setting up takes a few minutes. You create an account, answer a few questions, and Teamdeck builds your organization and a checklist of next steps. When it is done, you can invite your team and start scheduling.
Before you start
- Have the name of your organization and its time zone ready.
- Your new organization starts on the Startup Plan. See Startup plan vs. business plan for what you can upgrade to.
Create your account
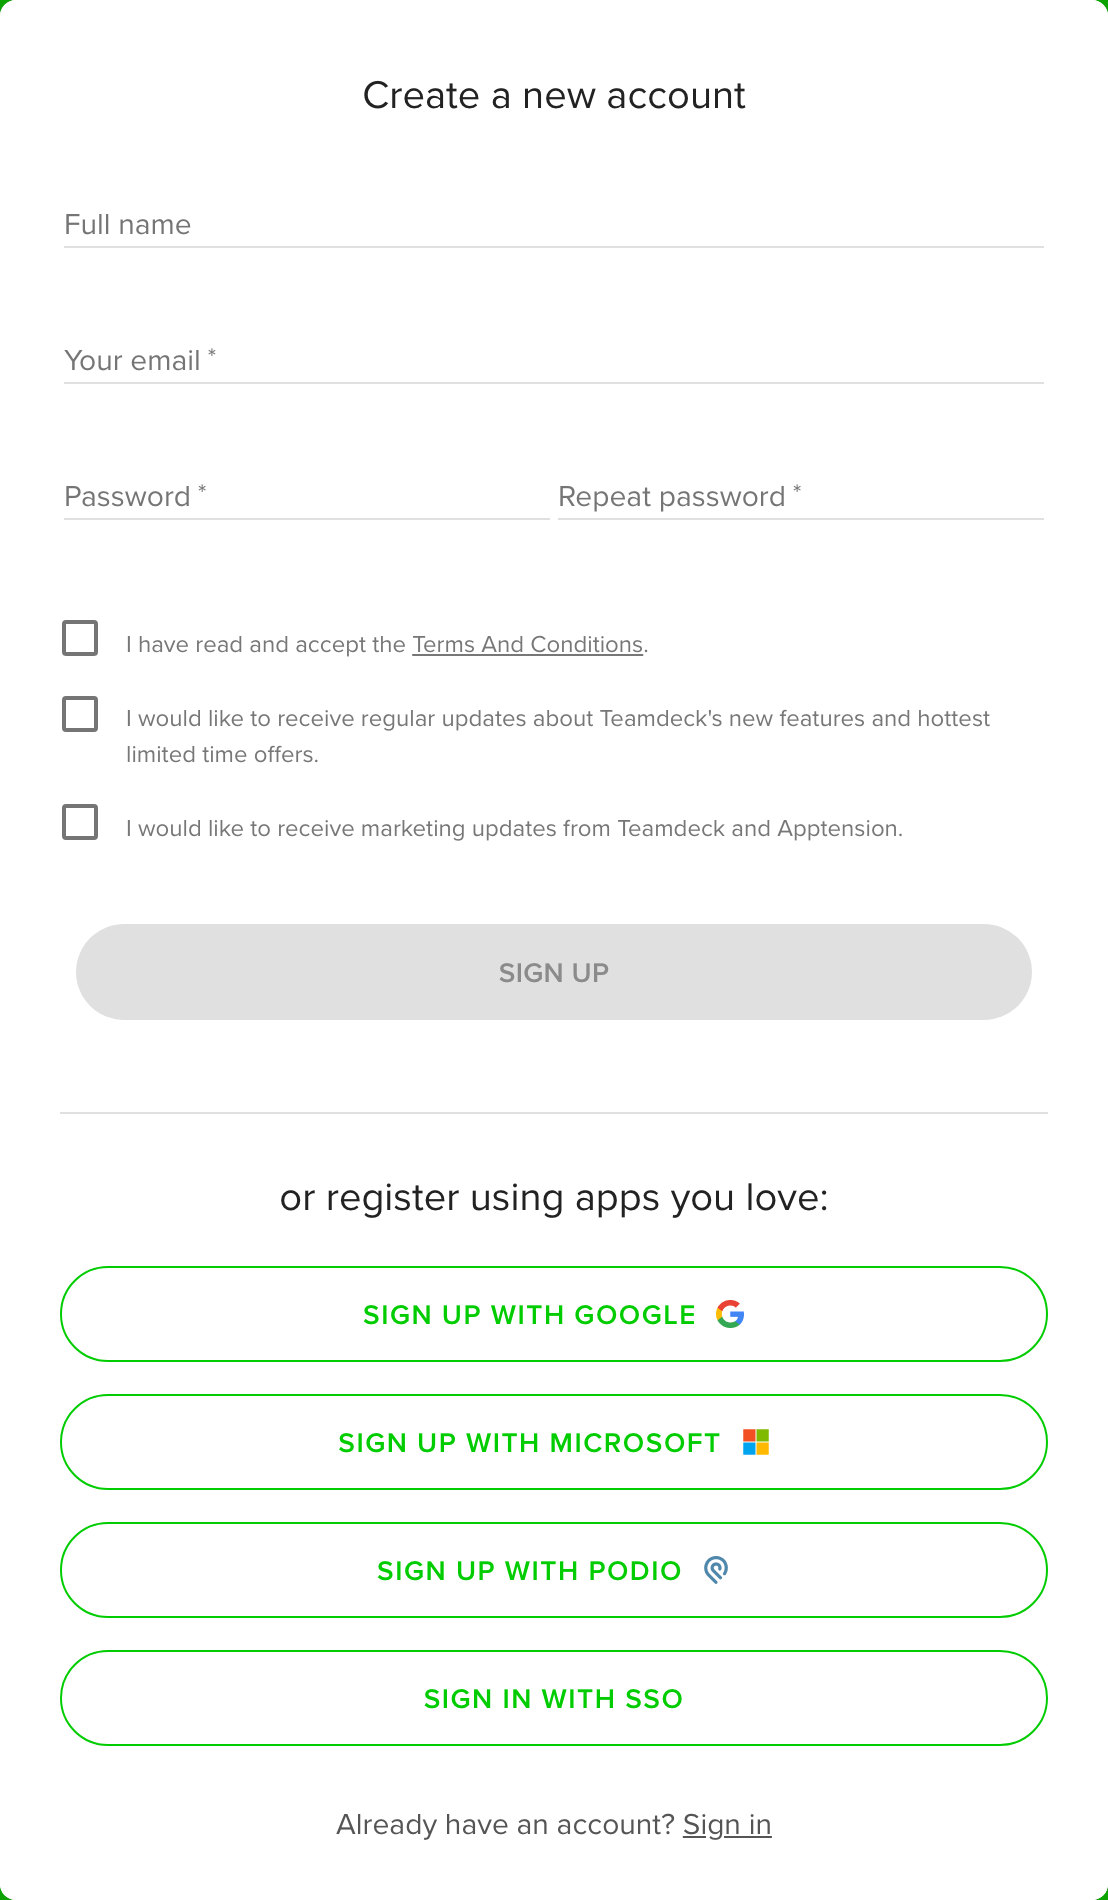
- Open the Teamdeck sign-up page.
- Enter your name, your email and a password of 6 to 64 characters, then repeat the password.
- Accept the Terms And Conditions. The two update options are optional.
- Click Sign up. You can also use Sign up with Google, Sign up with Microsoft or Sign up with Podio.
- Open the confirmation email we send you and follow the link within 48 hours. Open it in the browser where you are signed in; anywhere else we ask you to set a new password first.
You can start using Teamdeck right away. Until you confirm your email, invitations you send wait and go out once you confirm. People who join through an invitation skip the confirmation email.
Run the first-time wizard
The first time you sign in without an organization, a wizard opens.
-
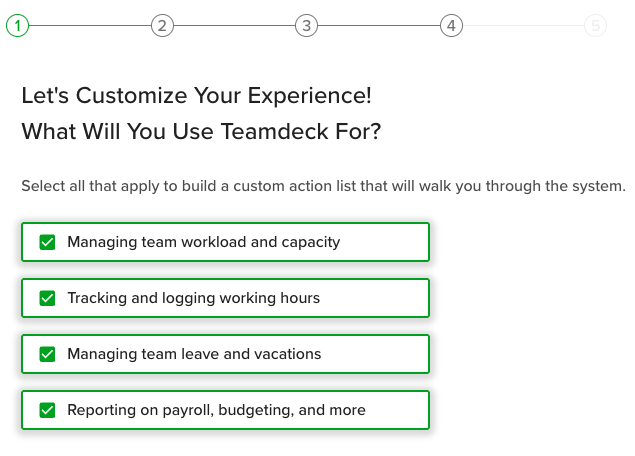
Pick what you want to use Teamdeck for. Choose at least one goal.
-
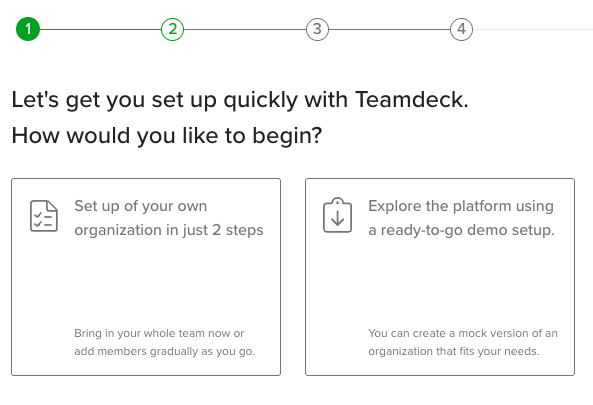
Choose how to begin: set up your own organization, or explore a ready-to-go demo setup with sample data.
-
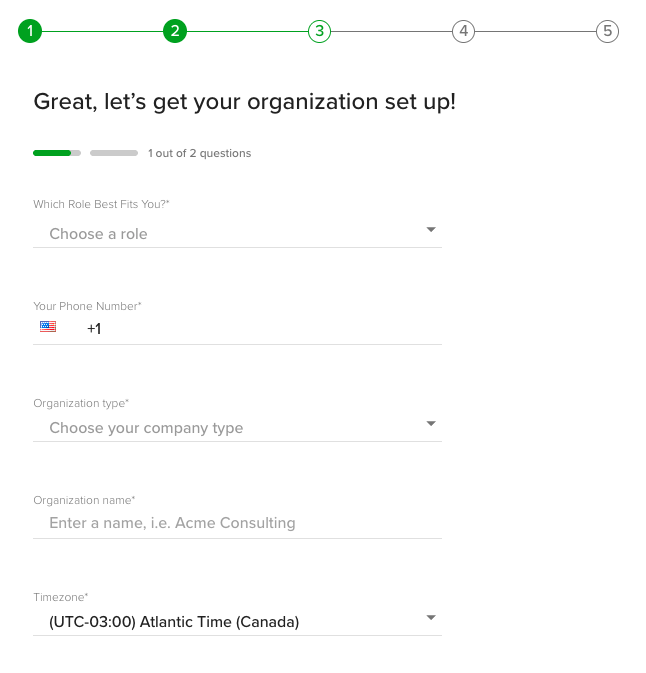
Enter the details. For your own organization, give it a name and a time zone. For the demo, pick a type of organization, your role and a team size of up to 20.
-
For your own organization, add your team. The table starts empty; the grey names are examples.
- Type a name to add someone as a Light Member.
- Add an email in Email (optional) to invite them as a Full Member. They get the invitation email when you click Finish.
- Leave the table empty, or click Skip, to add people later.
-
Choose whether you want product and marketing updates, then finish.
A demo organization is read-only for many settings. You can create up to six and delete them any time.
Follow the checklist
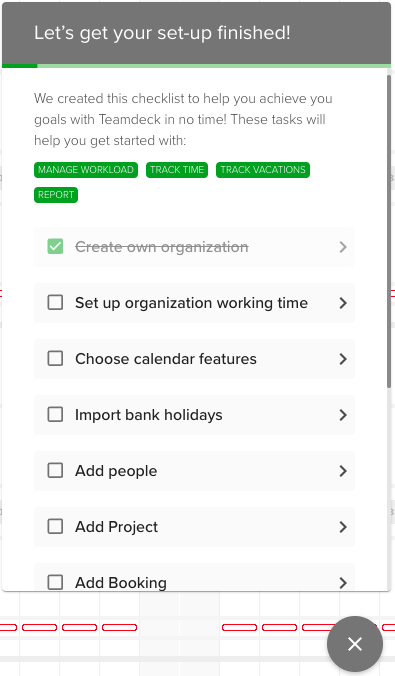
The checklist lists the next steps for the goals you picked, for example setting up working time, choosing calendar features, importing bank holidays, adding people and adding a project. Click Don't show the checklist again. to dismiss it.
Set your working time and calendar features
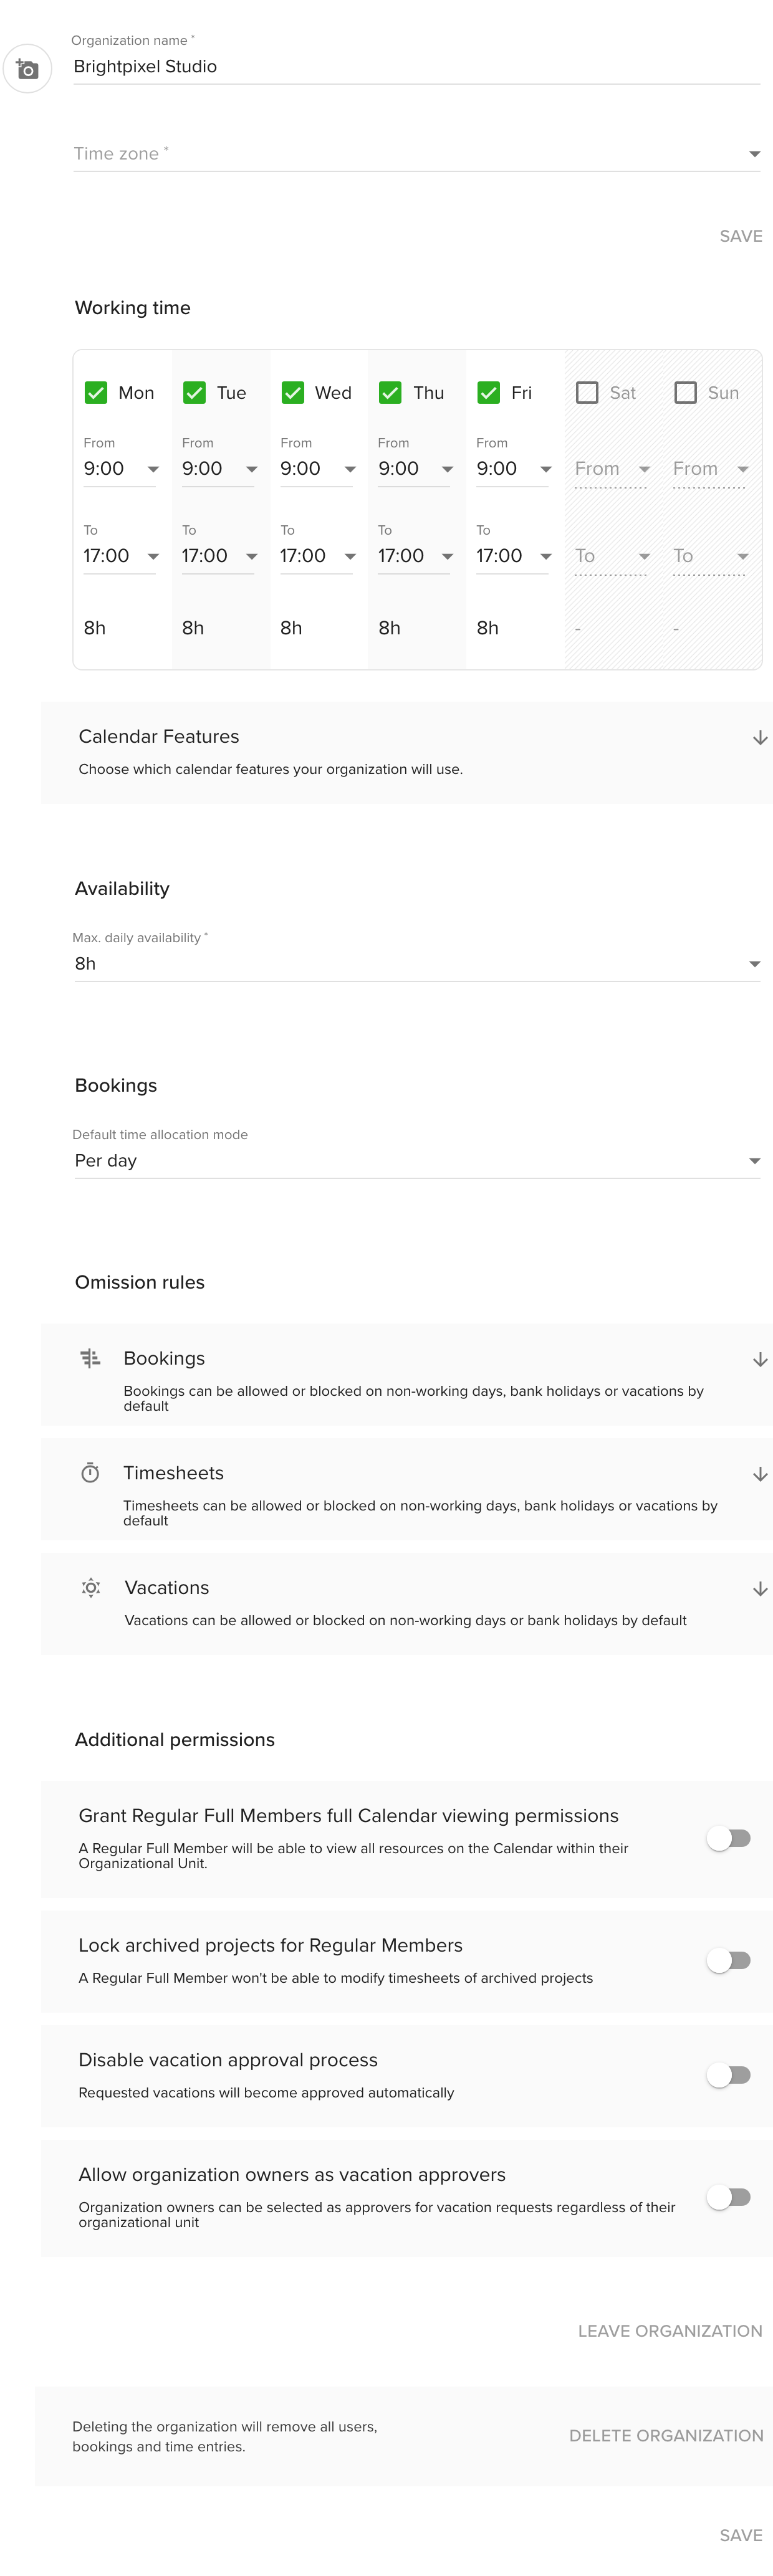
Only the Owner can change these settings.
- Go to Settings and open Organization.
- Check the Organization name, add a logo (PNG or JPEG, up to 2 MB) and pick the Time zone.
- Under Working time, tick the days you work and set the start and end of each day. Teamdeck uses this to calculate utilization.
- Open Calendar Features to switch off what you do not need. Time tracking, vacations and milestones can be turned off. Bookings and availability stay on.
- Under Availability, set Max. daily availability.
- Under Bookings, choose the Default time allocation mode: per day, total or percentage.
- Under Omission rules, decide what is blocked by default for bookings, timesheets and vacations: weekends, bank holidays and vacation days.
- Under Additional permissions, switch on the extra permissions you want. See Control who sees which people and projects.
- Click Save.
Changes apply to new entries. Existing bookings and time entries are not rewritten.
Next steps
Add your people and projects, then start planning. See Add people to your organization.
Troubleshooting
- I did not get the confirmation email. Check your spam folder. The link is valid for 48 hours; if it expired, click Resend confirmation email in the app, or reset your password, which confirms your email too.
- Name not accepted. An organization name is 3 to 50 characters: letters, digits, spaces and a few punctuation marks.
- Settings are greyed out. Only the Owner can edit them, and a demo organization is read-only.