

Set up projects
Create projects, add tags, approval and milestones, import many at once, and archive or remove the ones you no longer need.
On this page
A project is what people are booked on and log time against. For agencies these are client projects or deals. For product teams they can be features, campaigns or tasks.
Before you start
- You need the Owner or Manager role.
- Optional: create your project tags and custom fields first, so you can pick them right away.
Create a project
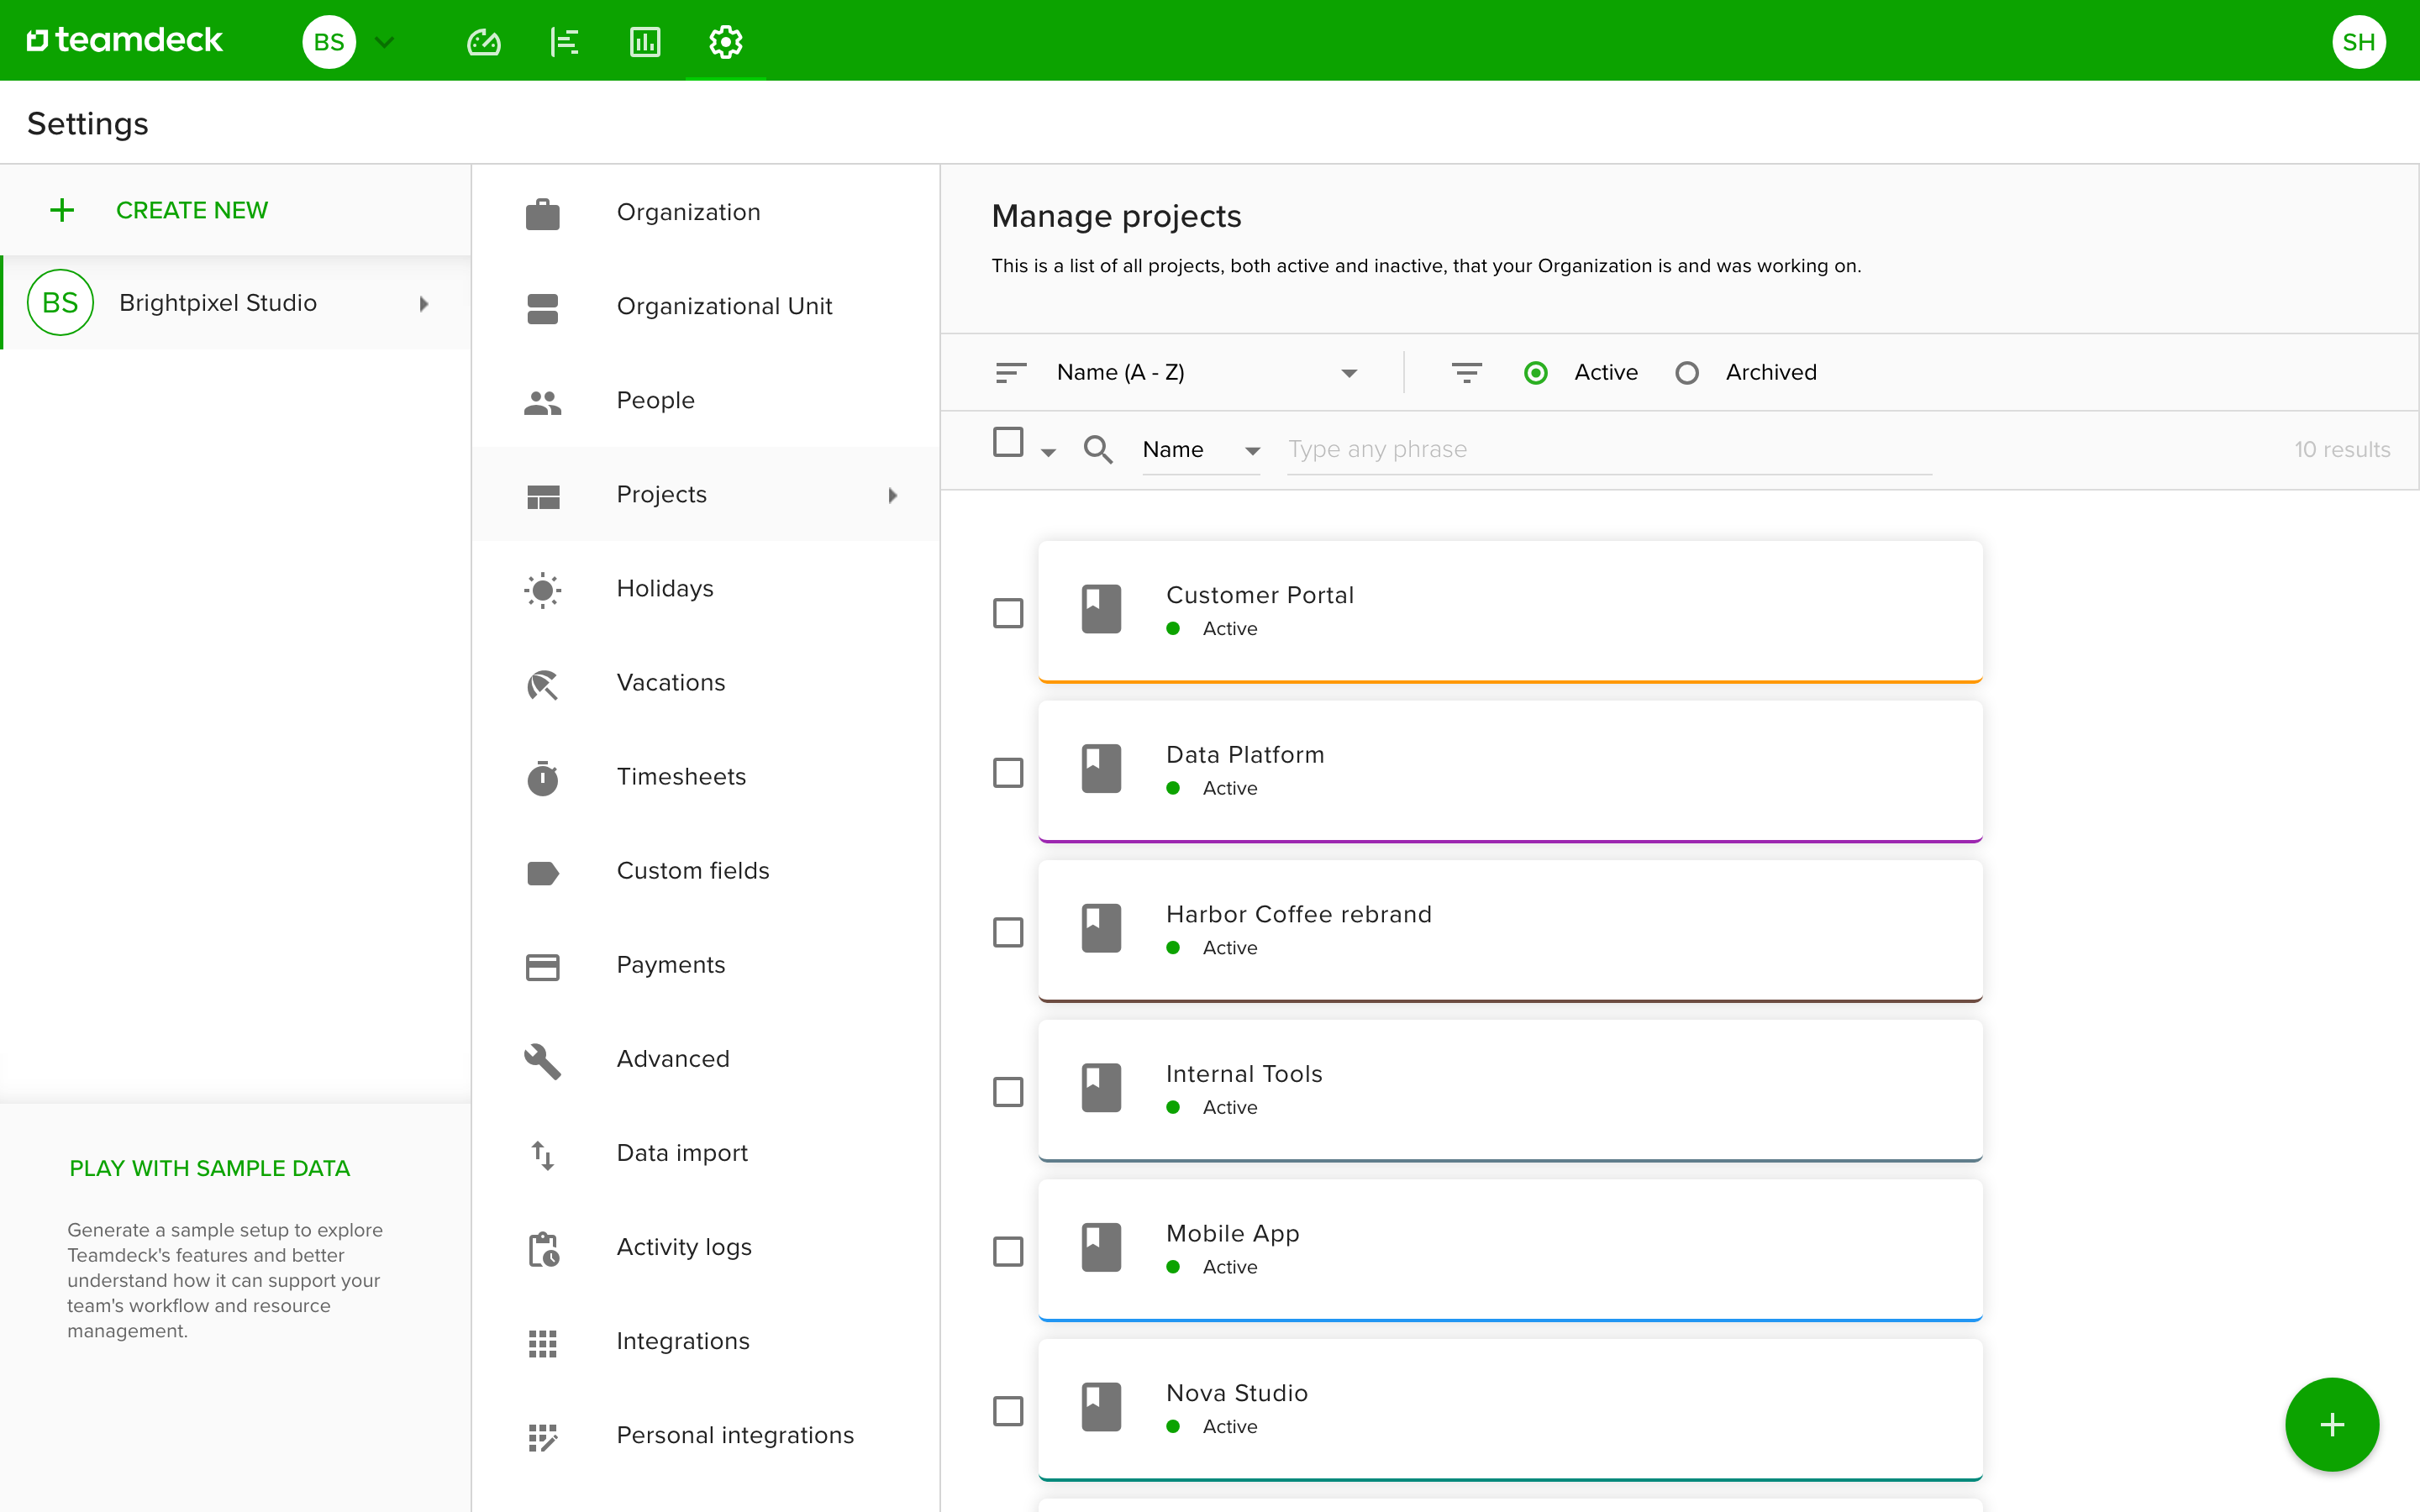
- Go to Settings and open Projects.
- Click the green + button.
- Enter the Project name. It can have up to 100 characters.
- Pick a Label color. It marks the project in the calendar and timesheets.
- Optional: add Tags to group projects, for example Billable or Internal. Tags are managed in Settings > Advanced.
- Optional: fill in Custom fields, and choose an Organizational Unit to control who can see the project.
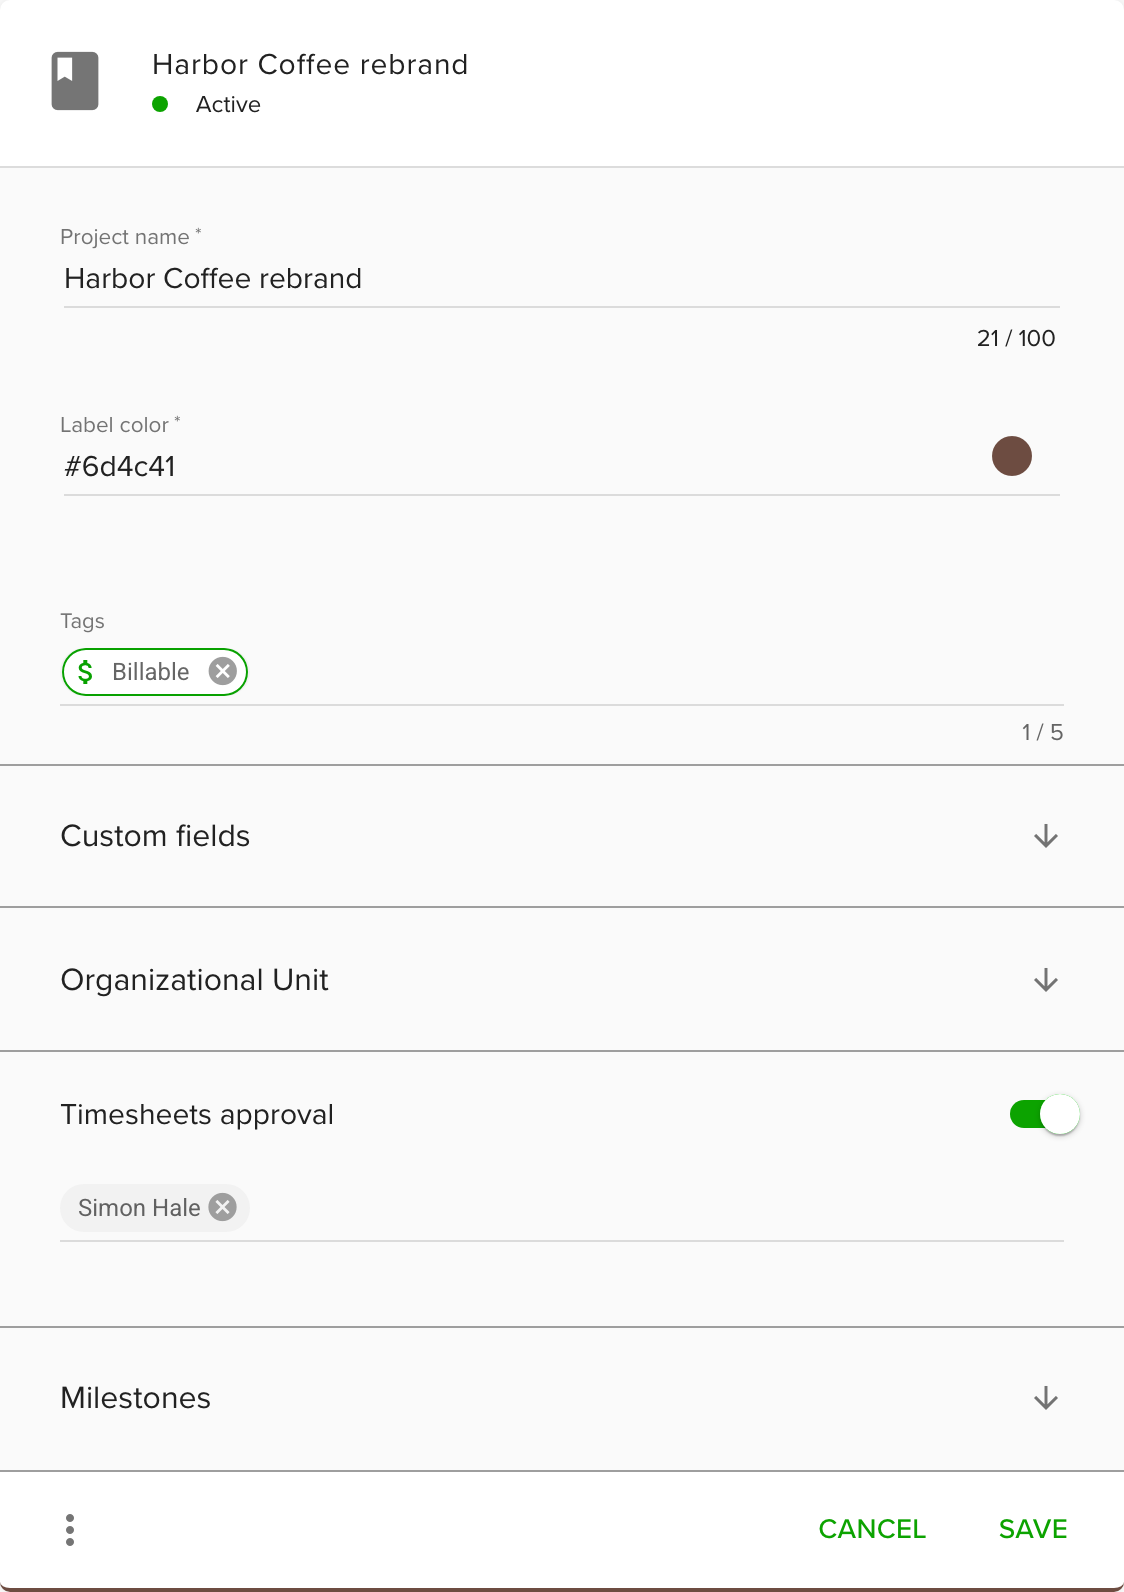
- Optional: switch on Timesheets approval and choose an approver. The approver must be an Owner or a Manager who can see the project. Time entries on the project then wait for approval. See Timesheet approval.
- Optional: add Milestones. See Add milestones to your projects.
- Click Add new.
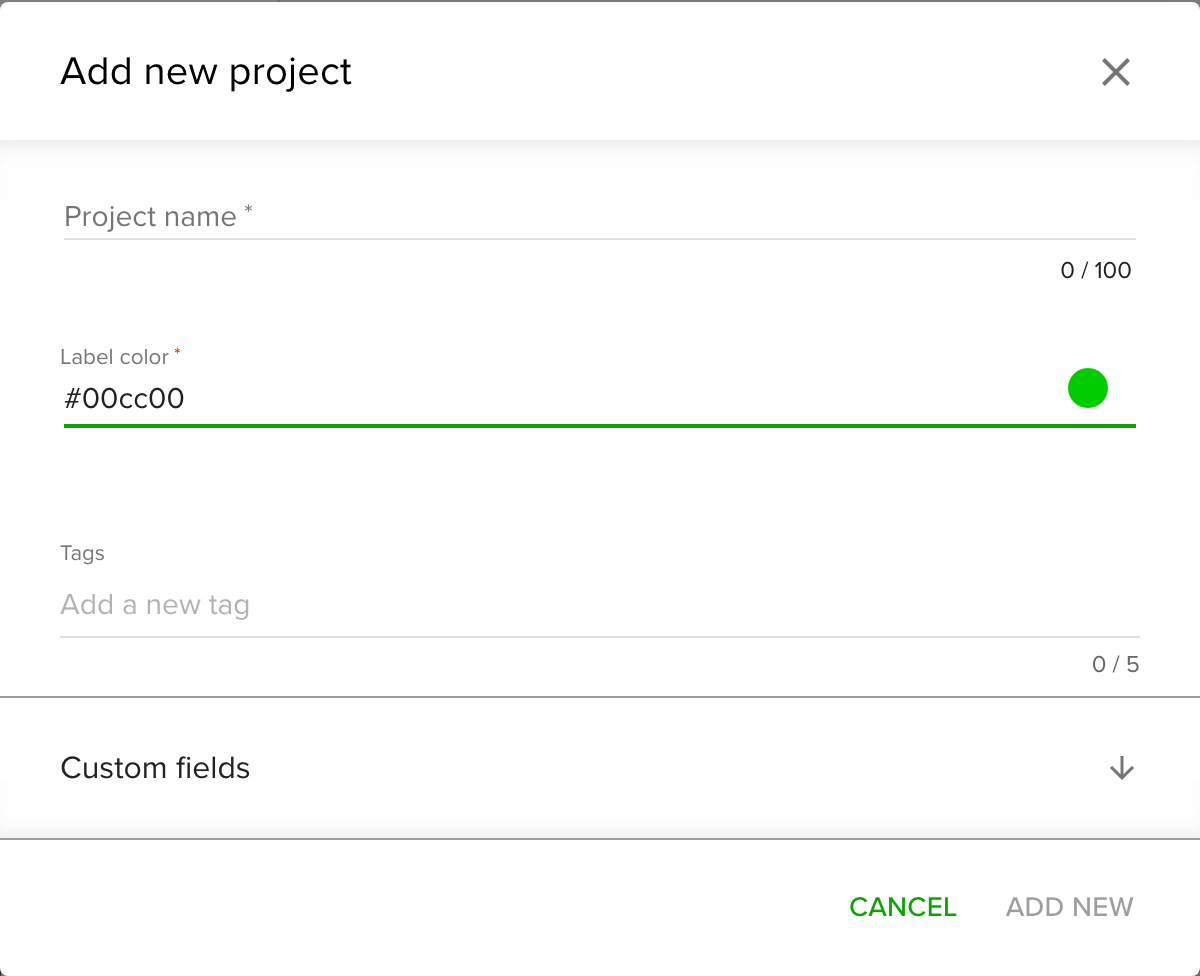
The project appears in the list and in project pickers for bookings and timesheets.
Edit a project
Click a project in the list to open its form. Change what you need and click Save.
Archive, restore or remove projects
- Use the three dots in a project's form to archive or restore it. Archived projects disappear from pickers but keep their history. Switch between Active and Archived above the list to see each group.
- To remove a project, archive it first. The remove action works 4 hours after archiving.
- Select several projects with the checkboxes to archive, restore or remove them together.
Removing a project is permanent. Its bookings, time entries and milestones are deleted with it.
Find a project
Use the search field above the list to search by name. You can also sort by name and filter by organizational unit or custom fields.
Import projects
Use the import to add many projects at once from a CSV or text file, or by pasting from a spreadsheet.
- Go to Settings and open Data import.
- Next to Projects, click Import projects.
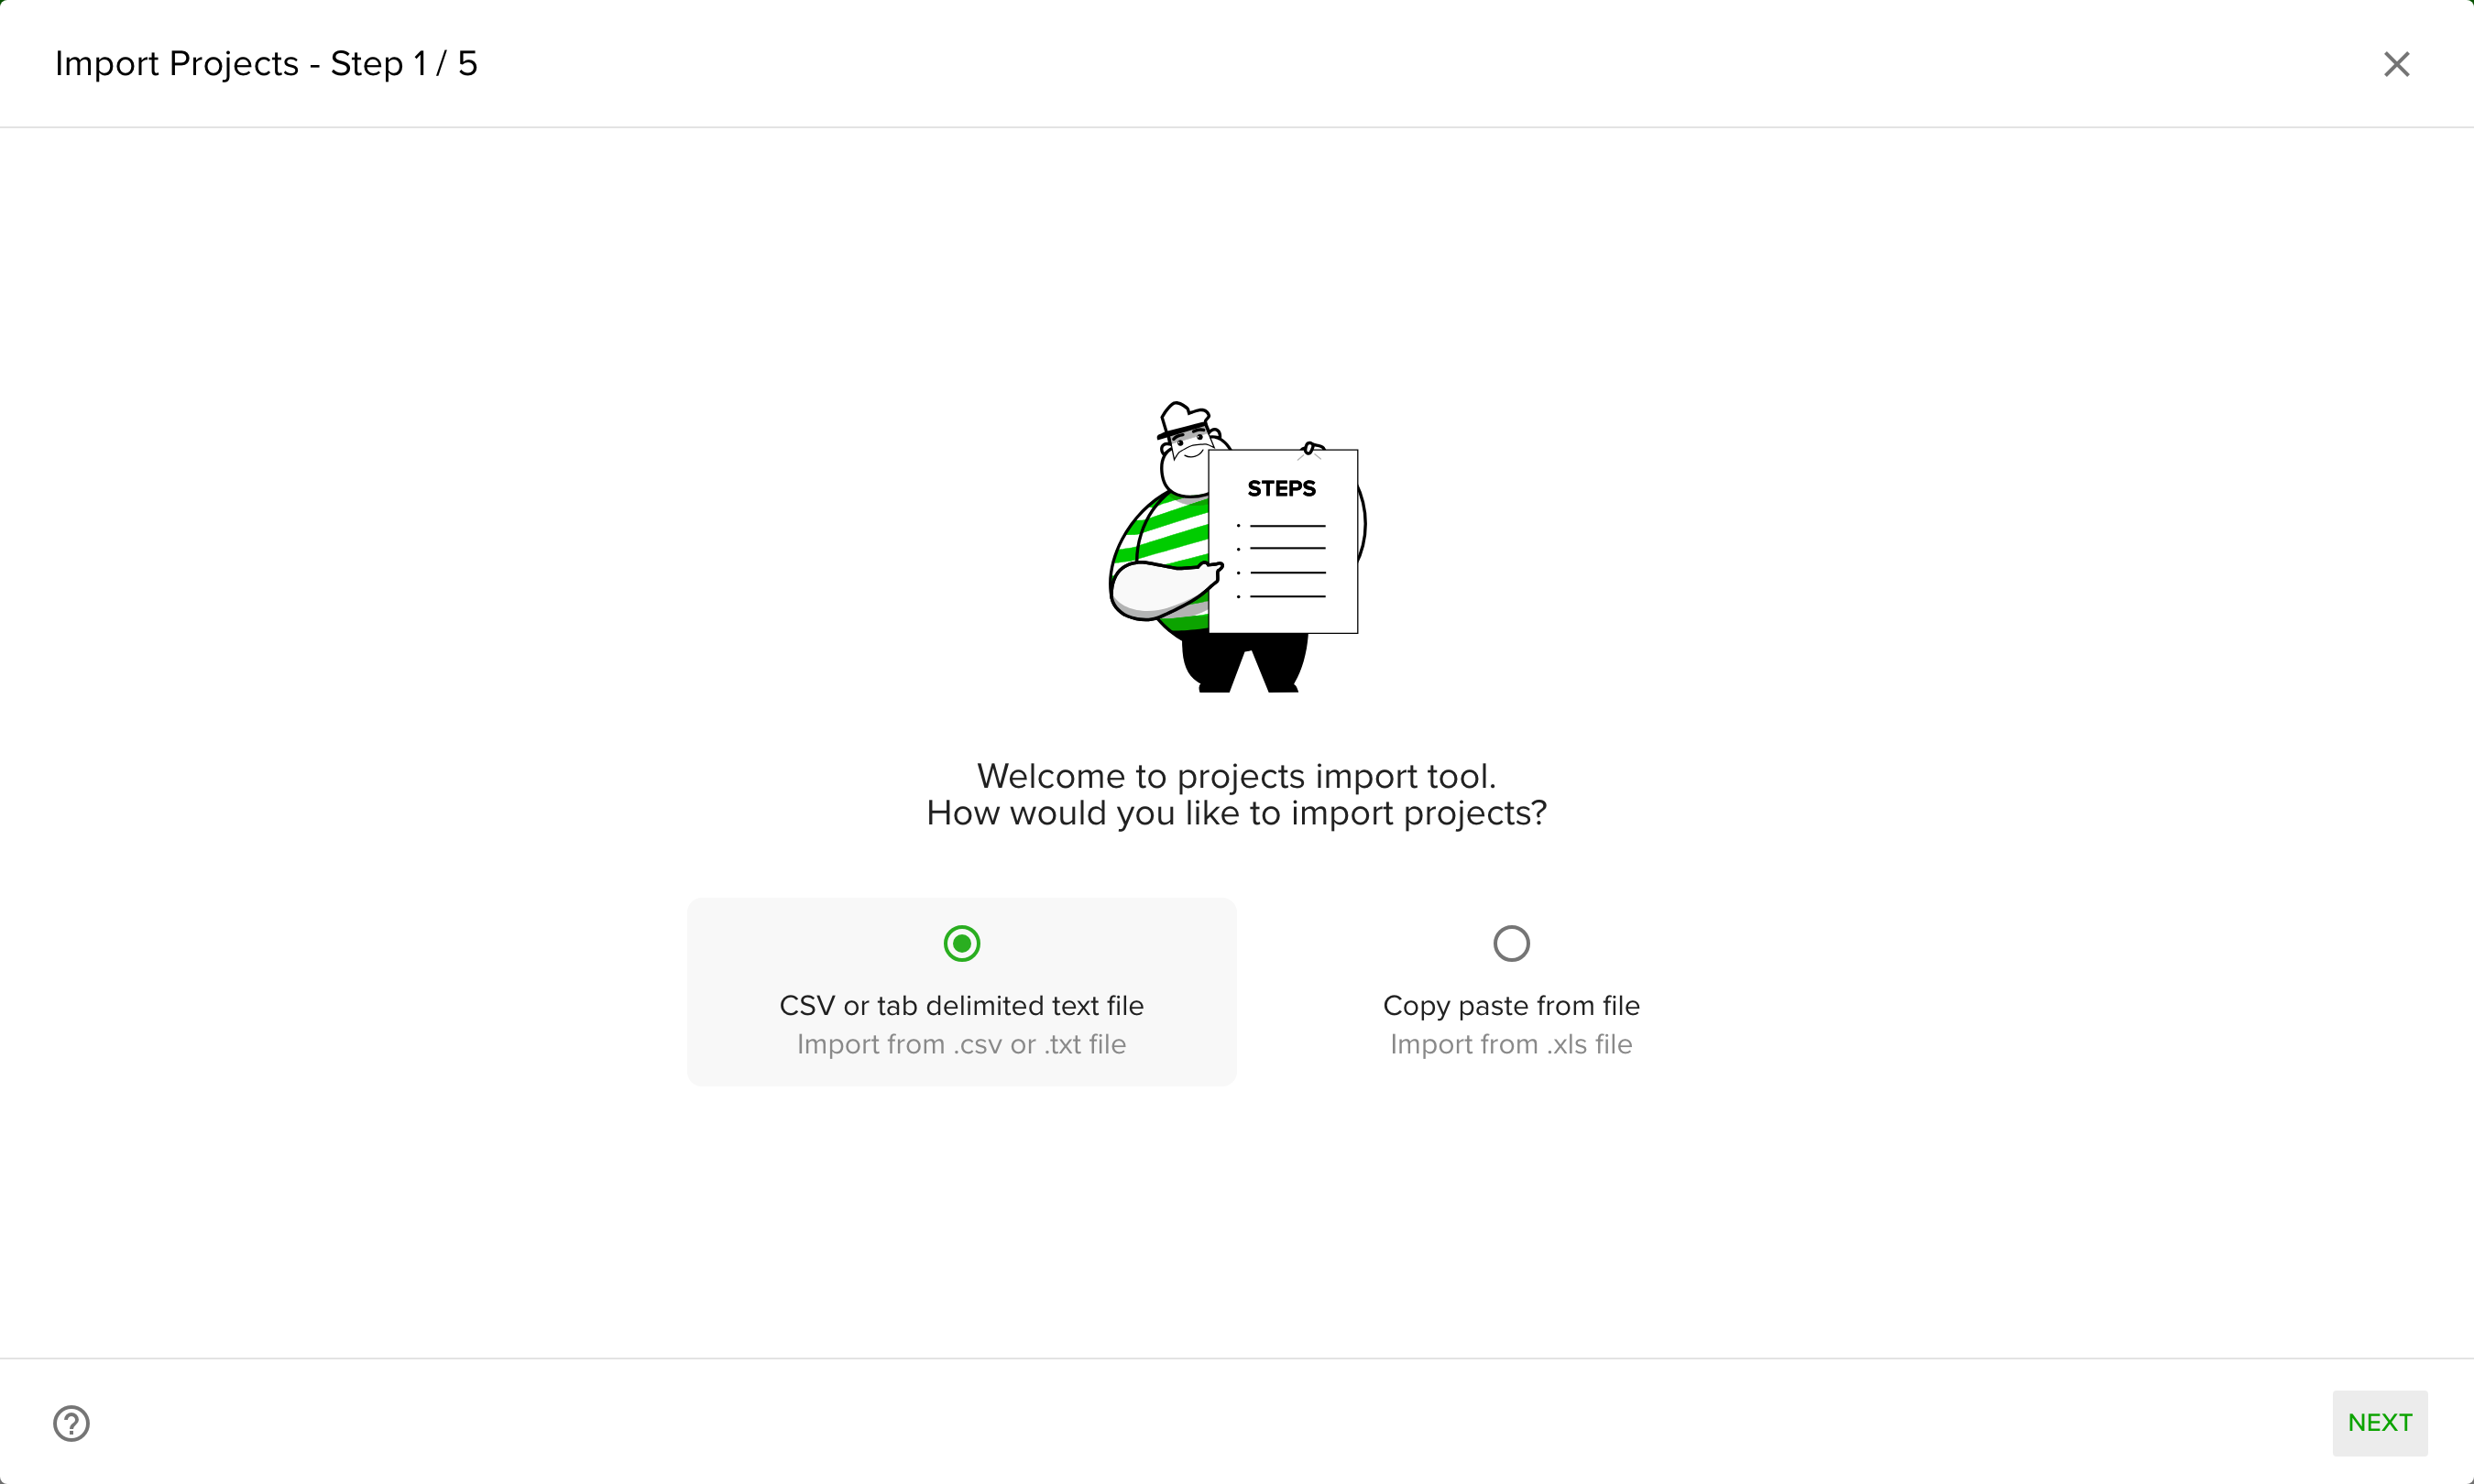
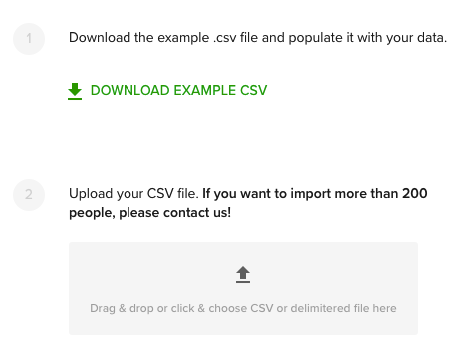
- Choose CSV or tab delimited text file or Copy paste from file, then follow the steps.
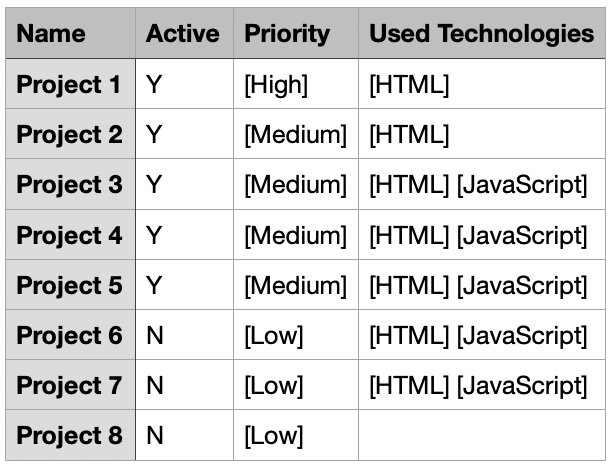
- Download the template in the wizard to see the columns, and fill it in.
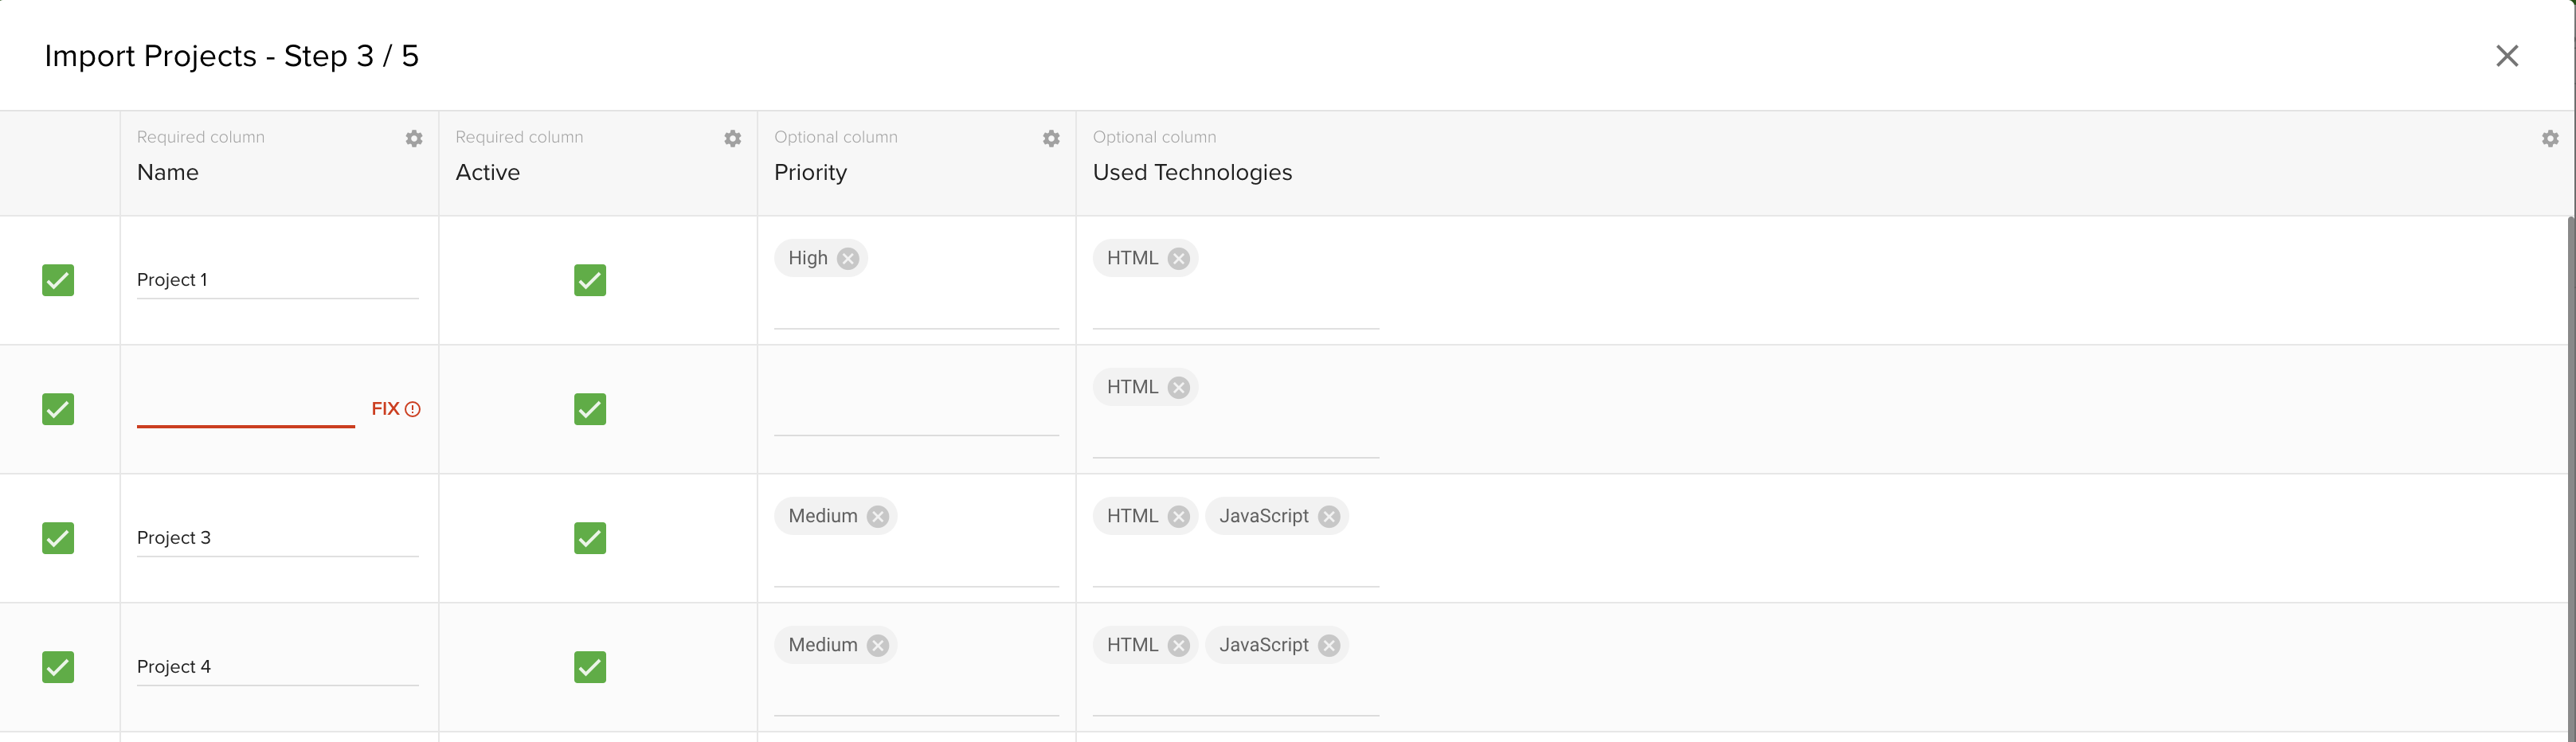
- Review your data. You can edit entries before the import starts.
Good to know:
- Owners and Managers can import. On the Startup Plan, the import asks you to upgrade.
- Projects are matched by name, so importing an existing project updates it.
- If your file has a column that is not a custom field yet, Teamdeck creates the custom field.
- If some rows fail, the others stay imported. You get a notification and an email when the import ends.
- You can cancel a running import. Its rows are rolled back.
Tips
- Use tags such as Internal or Billable and group reports by them.
- Mark finished projects as archived so nobody books work on them by mistake.
Troubleshooting
- I cannot remove a project. It must be archived for at least 4 hours.
- The import does not start. Only one import of the same type can run at a time. Wait for the running import to end.