

Filter the Calendar and save views
Narrow the Calendar to the people, projects, tags or free time you care about, then save the result as a view you can reopen.
On this page
Filters cut the Calendar down to what you need: one team, one project, bookings with a certain tag, or people with free time next week. Save a filtered Calendar as a view and open it again with one click.
Before you start
- Everyone who can open the Calendar can filter it and save private views.
- Only Owner and Manager roles can share a view with the whole organization.
- Members who can see only their own row see only their private views.
Filter the Calendar

- Open the Calendar.
- Select Add filter above the grid.
- Pick a filter from the list, or type in Search for a filter to find it.
- Choose the values. The Calendar updates right away.
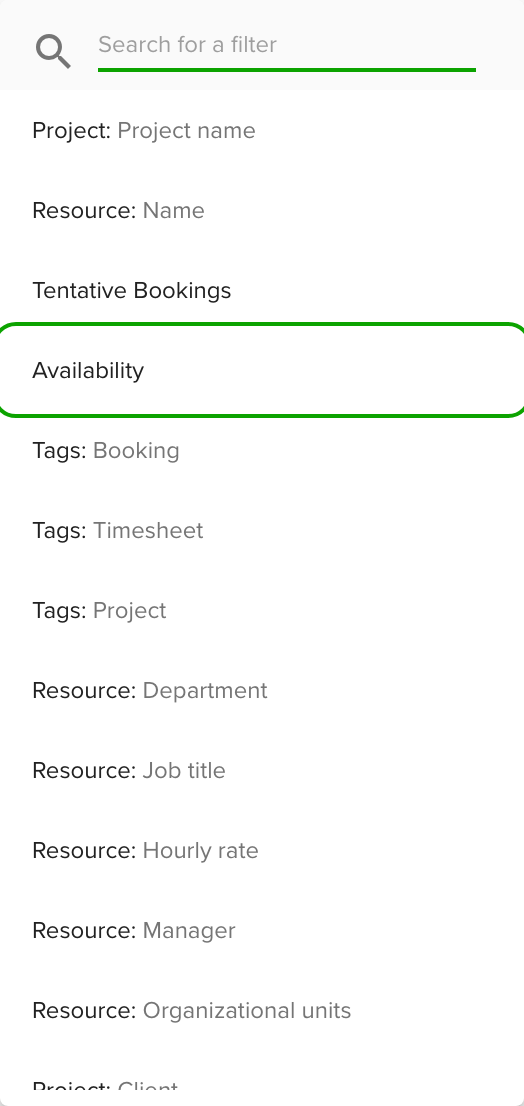
You can filter by:
- Project and Resource names, and Search for above the rows to find people or projects by name, email or custom field value.
- Tags: booking, timesheet and project tags. Choose tags to include or to exclude.
- Resource and Project custom fields, such as Department or Job title.
- Resource: Organizational units.
- Tentative Bookings: show or hide tentative bookings (Yes or No).
- Availability: find people with free time. Pick a period, and optionally a minimum number of hours per day or in total.
Select the x on a filter to remove it.
Find people with free time
- Select Add filter and choose Availability.
- Pick the start and end date.
- Optional: enter a minimum number of hours, and choose whether it counts per day or in total.
The Calendar then lists people who have free hours in that period. Free time is availability minus accepted vacations and bookings, so a person with a pending vacation request still counts as free. With a minimum, the period can be up to 6 months.
Save a view
- Set up the filters and the rows the way you want them.
- Select Save view.
- Choose Create new view and type a name in New view name. To change the view you have open instead, choose Save changes to the view.
- Under Where do you want to save the view?, choose Private view (only you) or Organization view (everyone who can see views).
- Select Save.
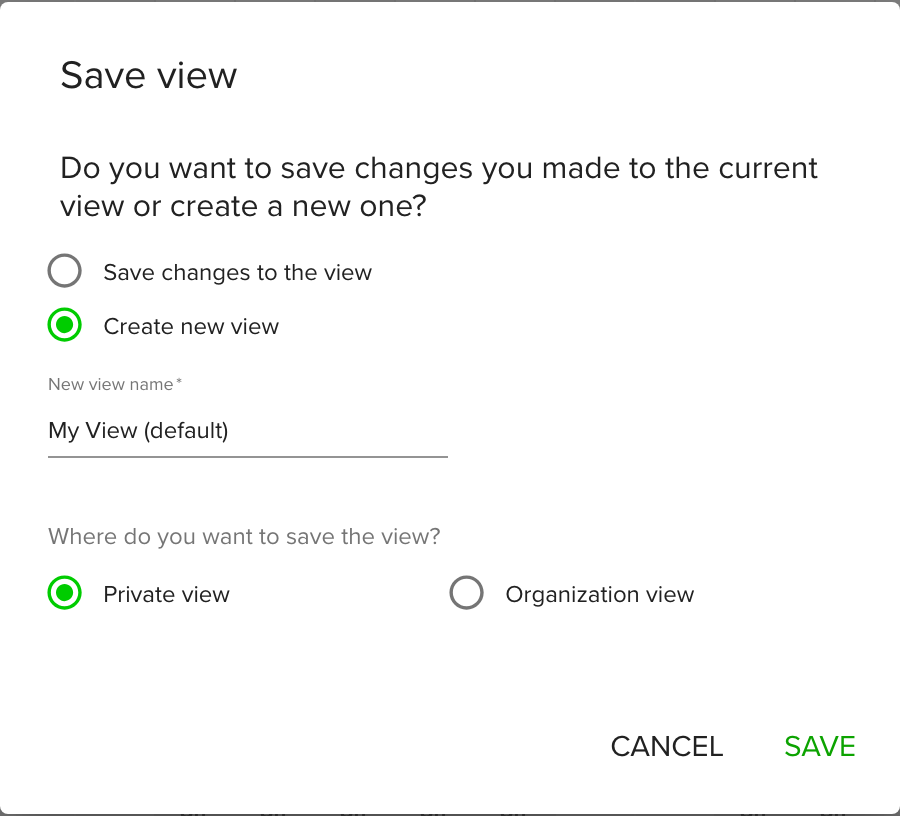
A view stores the filters, whether the rows are people or projects, and which data types are shown.
Open a view
Pick a saved view with Select view at the top of the Calendar. The list holds your own views and the organization views.
Watch the short video to see how to create a view.
Tips
- Name views after the question they answer, such as "Design team this month".
- Use an organization view for filters the whole team needs, such as "Everyone on the Harbor Coffee rebrand".
- Reset the filters before you export if you want everyone in the file. The export follows the filters you see.
Troubleshooting
- I cannot choose Organization view. Only Owners and Managers can share views.
- A view disappeared. A view is removed when deleting a custom field value leaves it without any filter.
- The Save view button does not save my filter. A filter needs a value before you can save. Check for a tag group with no tags, a custom field without a value, or an availability filter without dates.
- The Availability filter shows an error about the period. With a minimum number of hours, the period can be at most 6 months. Shorten the dates.