

Check your bookings and track your time
See what you are booked on in the Calendar, then log the hours you worked from the dashboard, the Calendar or your phone.
On this page
Your managers plan your work as bookings. You log what you actually worked on as time entries. Both live in the Calendar, and you can also add hours from the dashboard or the mobile app.
Before you start
- You need a Full Member seat.
- Your organization must have time tracking switched on. If you see no timesheets, ask an Owner.
Check your bookings
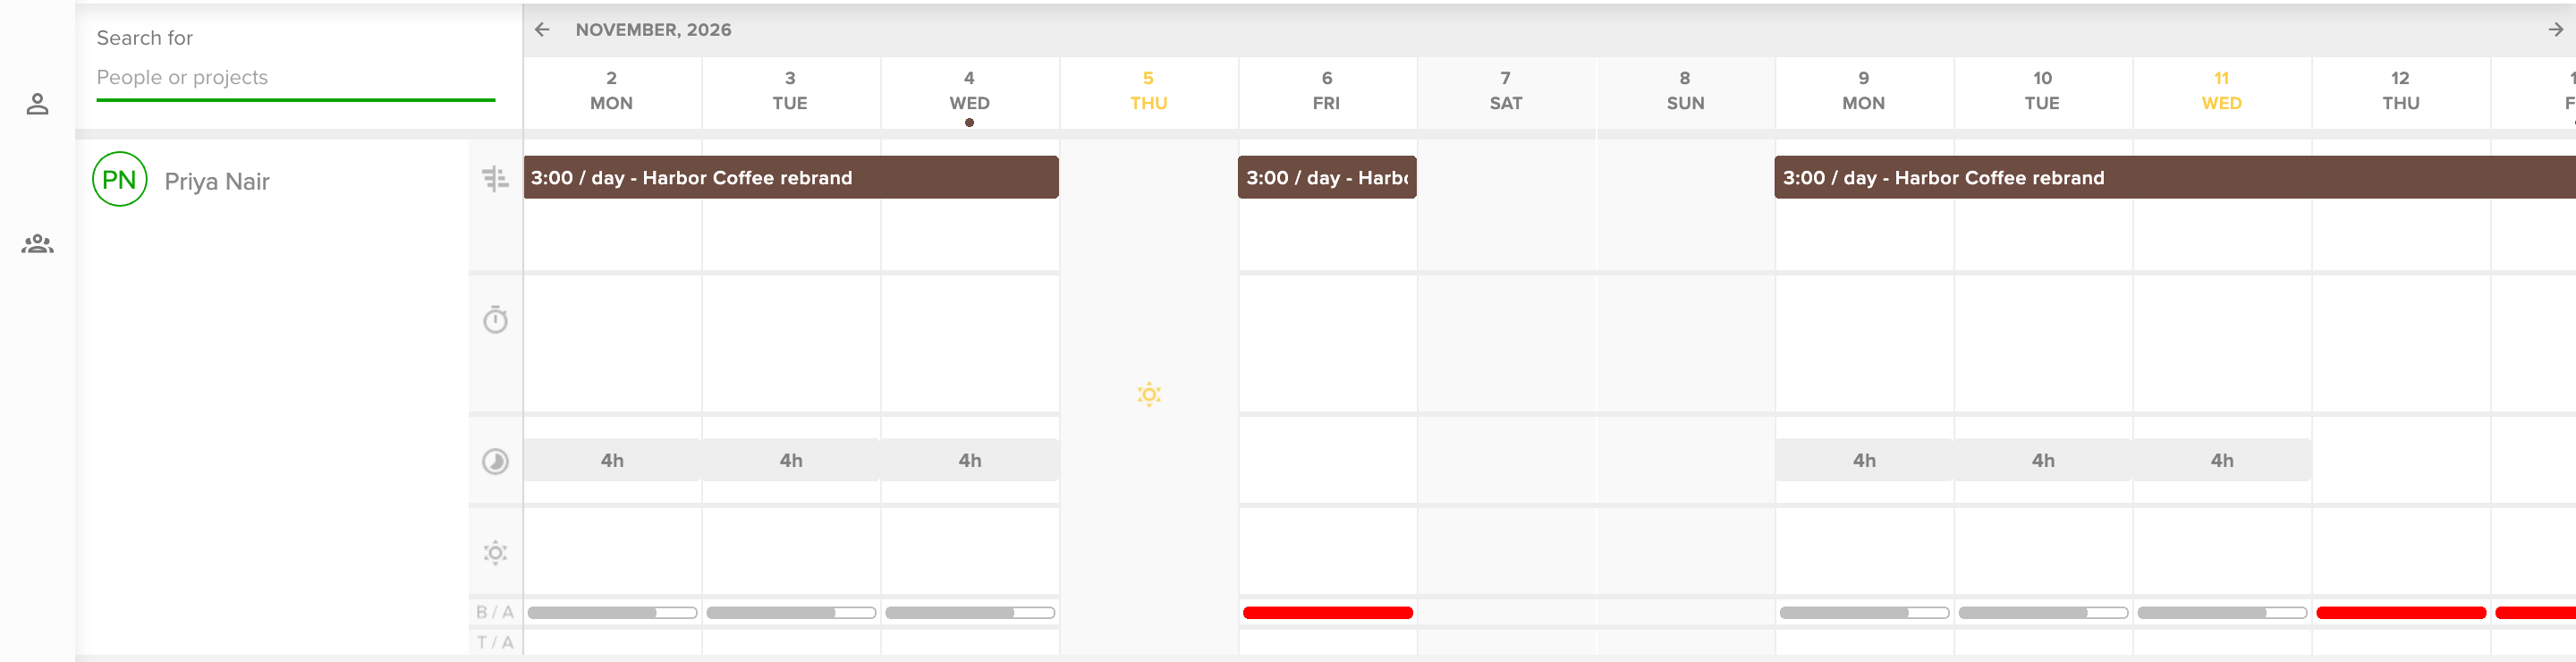
- Open Calendar in the top bar and find your row.
- Read the rows from the top: your bookings (planned hours on a project), your timesheets (the time you logged, stopwatch icon), your availability (clock icon) and your vacations and bank holidays (sun icon).
- Check the B/A and T/A bars at the bottom. B/A compares your bookings with your availability, T/A compares your timesheets with it. A full grey bar means you are fully booked (or have logged all your available hours). A red bar means you are booked for more hours than you are available, or have logged overtime.
Bookings are set by your managers. Unless you have the planning permission, you can see your bookings but not change them. To change one, ask your manager.
Add your hours from the dashboard
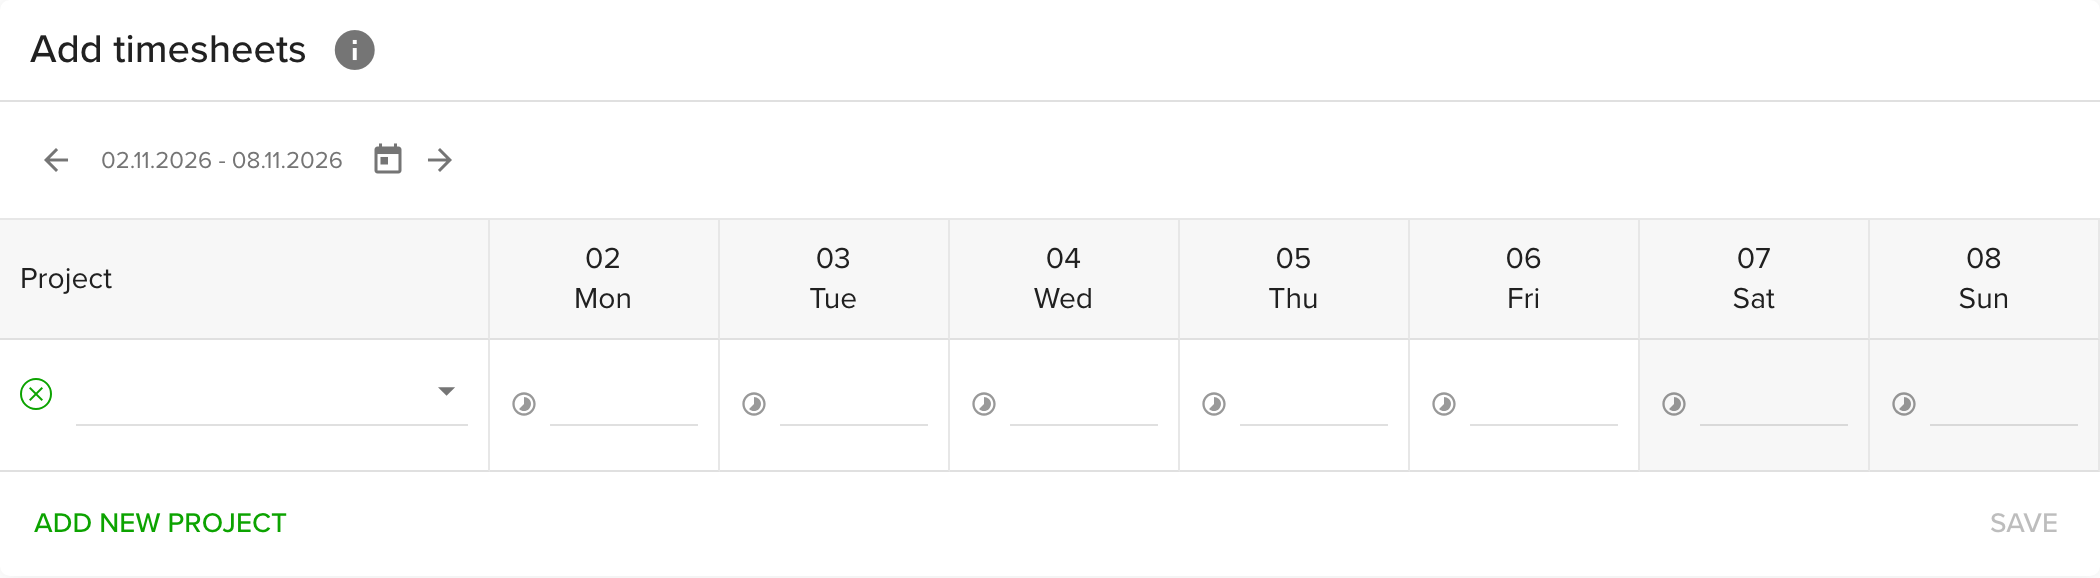
- Open the dashboard.
- In the Add timesheets card, check the week at the top. Use the arrows to move to another week.
- Choose a project in the first row. The card lists the projects you are booked on that week. To add another project, click Add new project.
- Type your hours for each day.
- Click Save.
After saving you can add more entries or go to the Calendar.
Add a time entry in the Calendar
- Open Calendar and find your row.
- In the timesheets row (stopwatch icon), hover over the day your entry starts. A plus icon appears. Click it, or drag across several days to set the end date. The drawer opens.
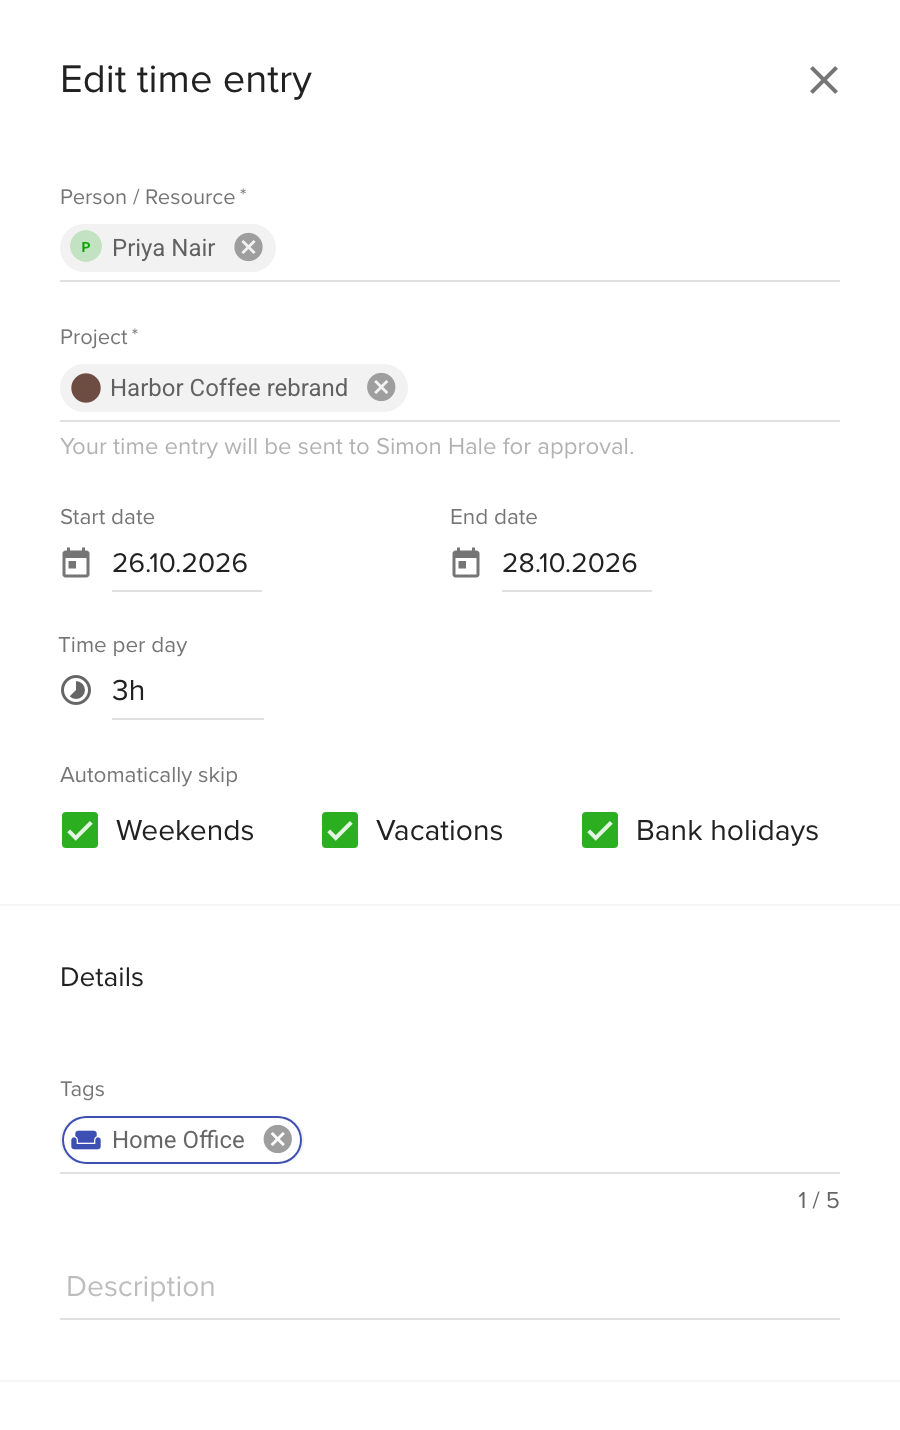
- Check the Start date and End date, choose the Project and set the Time per day.
- Under Automatically skip, tick Weekends, Vacations and Bank holidays to leave those days out. An entry across several days then only fills your working days.
- Add Tags if your organization asks for them, and a Description if you like.
- Click Save.
If the project needs approval, the drawer tells you who will approve the entry, and the entry shows as Pending. Once approved you can no longer change it.
Edit, split, duplicate or delete a time entry
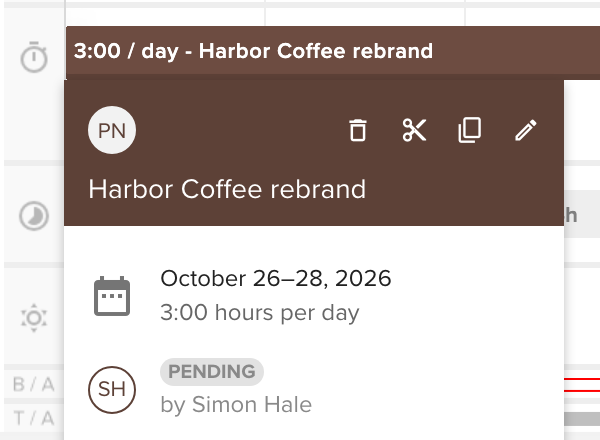
Hover over a time entry to see its card. The icons at the top are, from the left, delete, split, duplicate and edit. Click the entry or the pencil to open the Edit time entry drawer.
- Use the split icon to cut a long entry in two, for example to fit another project in between.
- Use the duplicate icon to copy an entry to other days.
- Use the trash icon to delete it.
You can only change your own entries. Managers can add and edit entries for you, and those show up in your timesheet.
Track time on your phone
Download the Teamdeck app for iOS or Android and sign in with your Teamdeck account. You can add, edit and delete your time entries there. See Teamdeck mobile.
Tips
- Log time at the end of each day. It is easier than reconstructing a week.
- If your organization sends timesheet reminders, you get an email when hours are missing.
Troubleshooting
- You cannot save an entry. If your organization requires tags, add at least one tag.
- You cannot add time to a project. The project may be archived and locked, or hidden from your role. Ask your manager.
- You cannot edit an entry. An approved entry is locked. Ask the approver to reject it first.